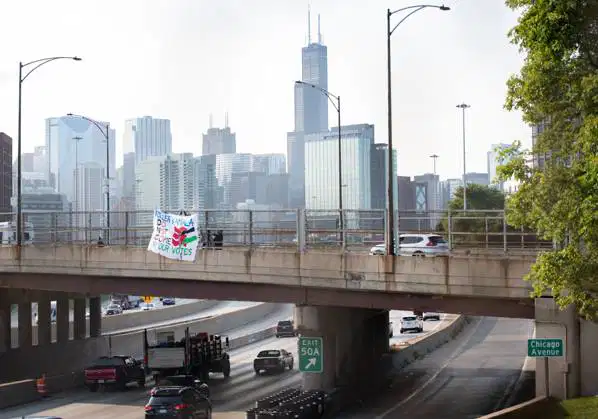
Feminist Global Resistance will be posting a series of articles on techniques and safety tips for activists.
Our first, “How to Drop a Banner to get your message to the masses”, is a technique for powerful messaging to be seen by a huge number of people.
Keep it short, powerful and on point.
A Drop Banner can be across a bridge, on a building, across a billboard, (if you are adventurous, a construction crane or construction equipment but always be aware that this will be trespassing).
You can bring further attention to the message on bridges and overpasses by positioning one or two activists at either end with flares or colored smoke sticks. (Be safe and use any flares or smoke sticks according to safety protocols. Gloves, masks and goggles are necessary for protection).
Be prepared for confrontation and keep it safe out there!

How to Drop a Banner to get your message to the masses
This is a how to Drop a Banner to get your message to the masses.
WHAT YOU NEED:
A big open room or outdoor space
A witty, short statement
A large piece of fabric (Or several smaller ones you sew together, these can often be found in the dumpsters of fabric stores; For larger canvas, a painting supply store or builder’s materials store)
A pencil
Paint (House paint works) and Brushes
Rope, Used bike inner tubes, or anything that you can tie to something else
Something to use as weights (dumpstered bagels work well)
A visible spot to deploy the banner (preferably with a railing or something to tie the banner to.) Billboards are also great 
A banner drop is basically creating your own free advertising. By dropping a large piece of cloth painted with words or an image off of a visible public place where there is high amounts of traffic (ex. a highway overpass), many people will be able to read your message clearly.
Before you start you should know what you want the banner to say. The message should be short (so you write it in big letters) and to the point so people can understand it. An example of some good slogans might be: NO WAR, HACKING HEARTS, STOP THE PIPELINES etc.
STEP ONE: PAINTING THE BANNER
Once you know what you are going to write, lay out your fabric in a space large enough that it isn’t bunched up anywhere. You should also put something you don’t mind getting paint on under the fabric as when you start painting the paint is likely to leak through for example, old cardboard, newspaper, etc…
Next, plan the layout of the letters by outlining them roughly in pencil. You should leave about 4-6 inches at the top and bottom of the banner blank. Make the letters as big as possible and as close in size as possible. After you lay out the letters in pencil, you should begin painting over where the pencil letters are. As mentioned about, house paint works well. Large brushes also help. You can add logos, circled “A’s, etc after you’ve finished the letters.
STEP TWO: PUTTING ON THE ATTACHMENTS
When you are finished painting you should cut two to three holes in the top of the banner; one on each side and one in the middle. Then you should cut three pieces of rope, or whatever other material you are going to use for tying. These pieces should be fairly long, about 1.5 feet or longer. You should run each piece of rope through each hole and tie a knot at the bottom of the rope so it stays attached to the fabric.
After you do this, do the same with the bottom of the banner–only when you have finished tying the rope to the fabric use the other end to attach your weights to the banner.. These help the banner stay unfurled and stable in the wind.
You’re almost ready to deploy the banner at this point. If you have time you should let the paint dry for a few hours, if not over night but if you need the banner immediately don’t worry about waiting overnight. The last thing you should do before you deploy the banner is cut several u-shaped cuts in the fabric where there is no lettering. These allow wind to pass through the banner without blowing it all over the place.
STEP THREE: DEPLOYING THE BANNER
The spot you pick to deploy the banner should be somewhere which is highly visible to the public so more people can see your banner. Parking garages that face freeways work well. The place you pick to deploy your banner should also have a railing or something else you can attach the top of the banner to.
Banners are likely to be quickly removed. With this in mind you should probably go out in the early morning, 4 or 5 am, to deploy the banner so that people on their way to work can see it before it is taken down. When you get to the place you are going to deploy it you should tie the three pieces of rope you have at the top of your banner to the railing and then drop the banner over the side of where ever you decided to place it. Make sure that the banner is unfurled all the way and is right side up before leaving.. After dropping the banner you’re finished.
Stay safe 


